Synfig 1.4.0 Release Notes
Synfig Studio 1.4.0 is a major stable release, which is introducing many new features and improvements. Please read below for details.
Animation Tools
Editable curves in Graphs Panel
Now curves in Graphs Panel have control points, and you can drag to change curve shape. Multiple selection for waypoints is also available. You can also use arrow keys on keyboard to move points. Double-click on a curve creates a new waypoint, Ctrl+A/Ctrl+D shortcuts are selecting/deselecting all points. Much thanks to Rodolfo Ribeiro Gomes for implementing this!
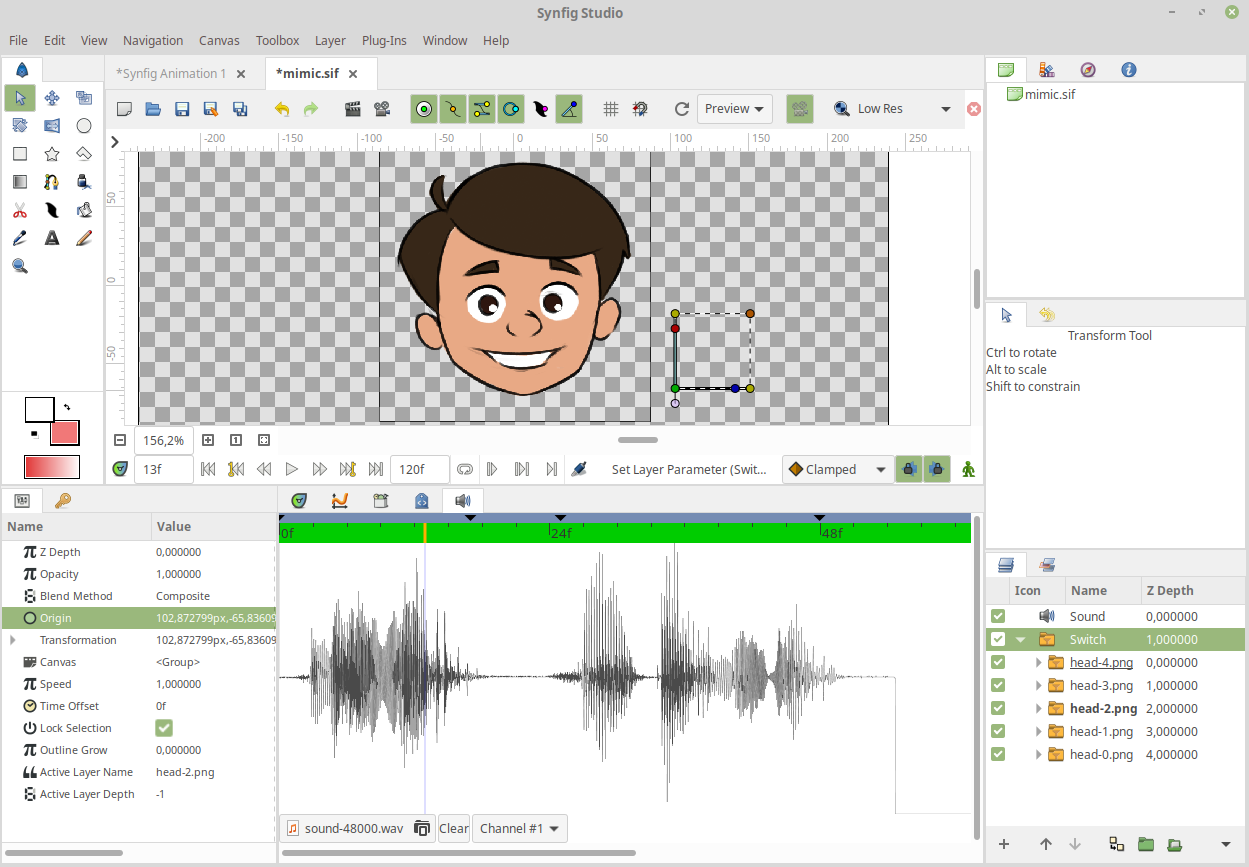
Sound synchronization features
We did a major cleanup of code responsible for sound playback, fixed non-working volume parameter and eliminated synchronization issues.
In addition to that, Rodolfo Ribeiro Gomes implemented a special panel to display waveform. Now it’s so easy to sync your animation with soundtrack!
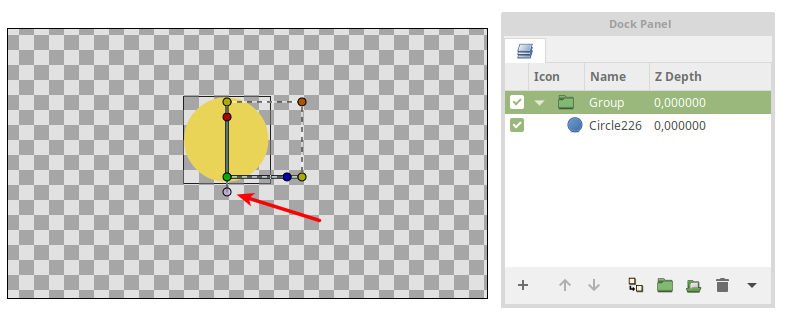
Control point to change Transformation Origin
Now transformation widget has a special control point to easily change origin of transformation.
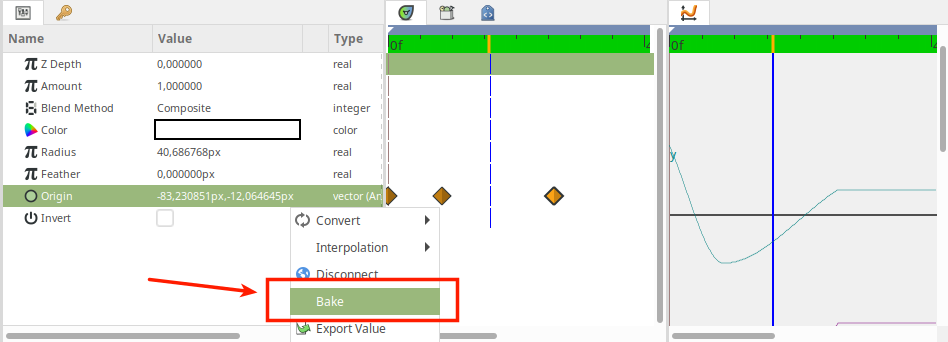
Animation Baking
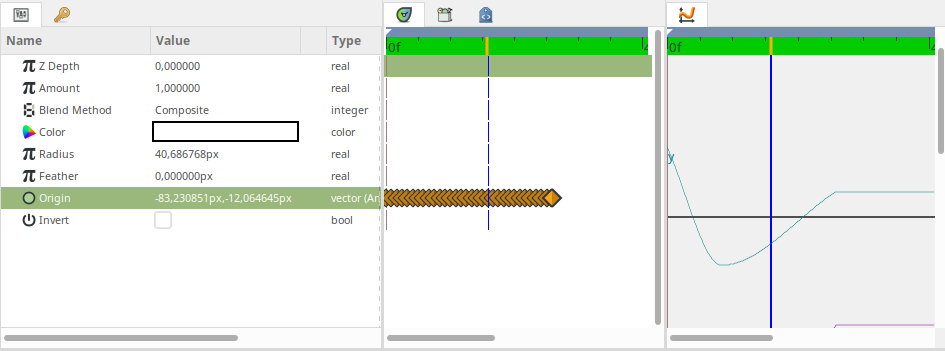
Now you can “bake” animation of any parameter! This operation “burns” any interpolated curve as a sequence of waypoints.
Result:
Improved TimeTrack
TimeTrack Panel got several improvements. Now you can define playback range and make playback looped. Hovering mouse cursor over TimeTrack now shows frame preview.
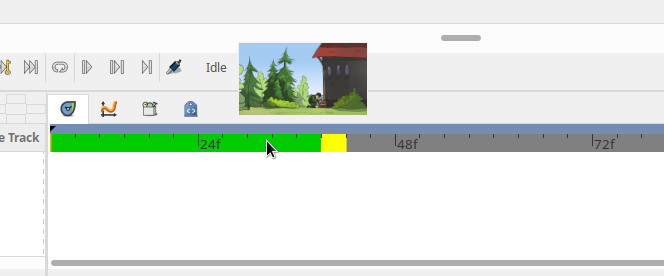
Frame thumbnail shown when cursor hovers timeline
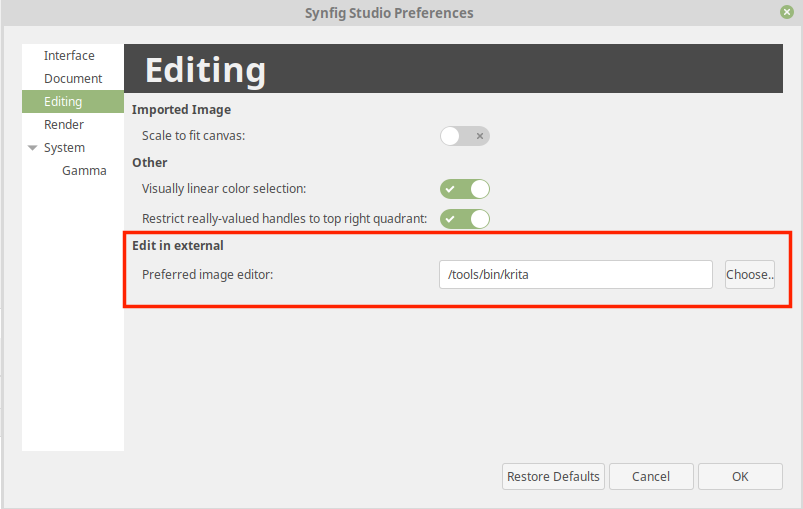
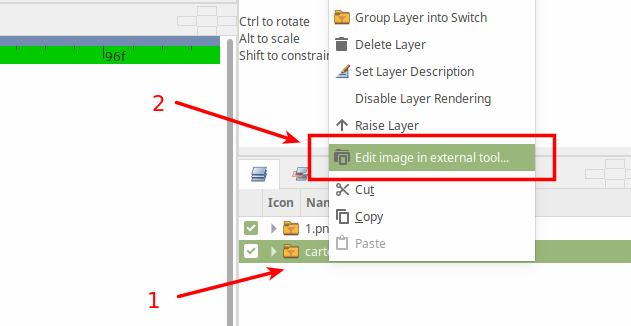
Open images in external tool
Ankit Kumar Dwivedi implemented a possibility to open images in external editor. Right now it is possible to configure preferred image editor via relevant option in Preferences. After that you can right-click any Image Layer and choose “Edit image in external tool…”.
Fixes and changes for onion-skin functionality
Onion-skin functionality was mainly broken since version 1.2.0 - it wasn’t able to display more than one onion-skin layer. Now this ability is restored. At the same time, we have changed functionality of onion-skin: in all previous versions it was linked to keyframes only, now it is set relatively to ordinary frames. We plan to continue improving onion-skin features as part of issue #600.
Importing
Simple import of image sequences
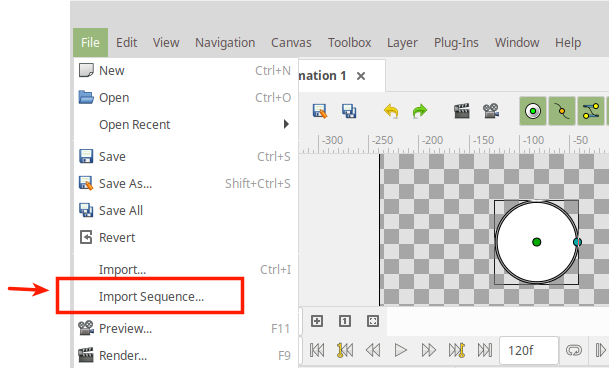
Now it is easy to import image sequences - just choose “File” -> “Import sequence…” from menu.
Vectorization of bitmap images
Synfig Studio now allows to convert raster (bitmap) image into vector image constructed from outlines. The vectorization algorithm is ported from OpenToonz animation software by Ankit Kumar Dwivedi, as part of Google Summer of Code 2019 program.
Basic video import functionality
This version introduces basic functionality for importing video files. At the current state the system is still too slow to work with large AVI and MP4 videos, but it is already possible to play with small animated GIFs (yes, it can import GIF as well).
Rendering and Export
Export animation for web (Lottie)
Synfig Studio can export animations to Lottie JSON format, which allows to embed them into web pages, play them natively in web browser and on mobile platforms. This format is also used for creating Telegram’s animated stickers! This feature is implemented by Anish Gulati as part of Google Summer of Code 2019 program.
Default render settings
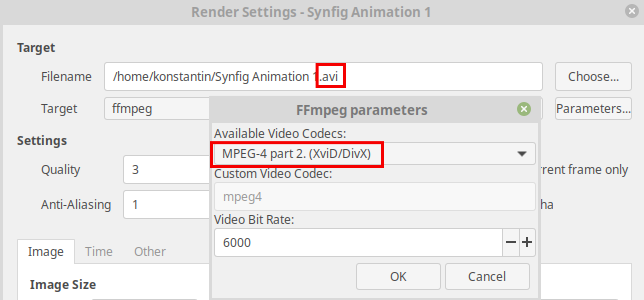
Default rendering settings now configured to use AVI format with popular mpeg4 codec by default, which resolves issues with playback on most systems (issue #464).
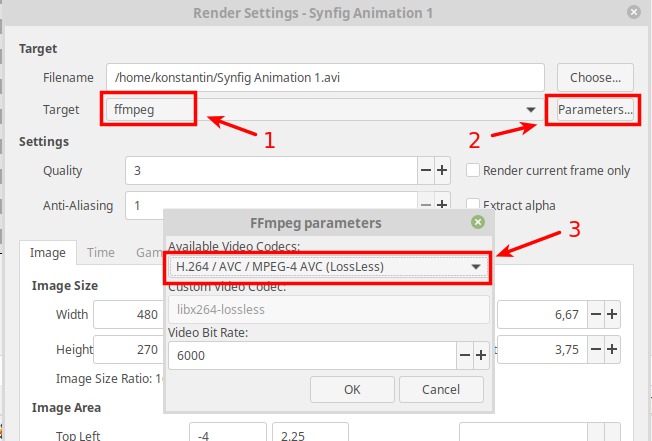
Still, if you wish to achieve best quality, consider to choose “H.264 (Lossless)” codec option.
Other notable changes regarding rendering process:
Changing rendering target now automatically changes extension of output file.
Rendering status is now indicated with a progress bar at Info Panel (issues #383, #626).
A sound notification is played when rendering is done (issue #648).
Render engine improvements
Render engine got some major optimizations, which greatly reduces time of handling scenes with many layers, comparing to version 1.2.2 (see issue #314).
In this version following layers got special optimizations: Outline Layer (completely rewritten), Region Layer, Checkerboard Layer, SuperSample Layer.
Also, render engine now has downsampling algorithm for bitmaps, which greatly improves quality resulting image.
Rendering result in Synfig 1.2.2

Rendering result in Synfig 1.4.0
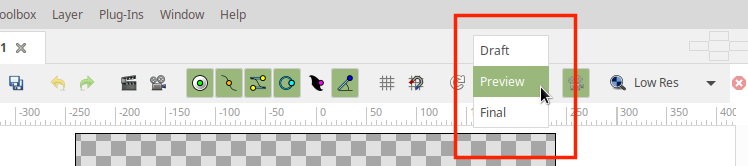
“Preview” rendering mode for workarea
Downsampling algorithm for images (mentioned above) greatly improves quality if your scene uses big images scaled to smaller size. Unfortunately, this operation demands additional CPU resources and you will notice general application slowdown when working with such scenes.
There is an option to enable Draft rendering mode (it disables downsampling), but this solution doesn’t fits for all cases, as it is hides many layers, which could be important for you.
So, we added one more display mode for workarea - “Preview” - which displays all possible layers, but with some simplifications - i.e. no downsampling, approximations for blur algorithms and some other simplifications. “Preview” mode is giving a fair compromise between speed and display quality and is used by default in GUI. For more details please check this discussion.
Workarea Cache and Background Rendering
Synfig now remembers already rendered frames, which is greatly improves experience of playback and timeline scrubbing.
Also, now it is possible to have background rendering of all frames in current animation. This allows to achieve very smooth playback and timeline scrub. You can enable background rendering using a relevant button on toolbar (see second video below).
Gamma handling
Since the very beginning of its development, Synfig was handling all color calculations with Gamma value set to 2.2. As result, there were a lot of issues with color interpolation and blending, like this one.
We decided, that it is good moment to get rid of this behavior and changed how Gamma handled in Synfig. The tricky part here was to keep compatibility with old files. Here’s what we did:
Gamma is now defined on per-document basis (in previous versions it was an application-wide setting). So, now every document has its own gamma value defined. You can see/change Gamma value by selecting “Canvas” -> “Properties” from menu and switching to “Gamma correction” tab.
For all newly created documents Gamma is set to 1.0.
Old documents (from previous versions) are opened with Gamma set to 2.2, so you won’t notice changes (although you will still notice same artifacts from old version, like the one noted here). You can manually set Gamma to 1.0, to get rid of those issues, but this will change the look colors would look in your animation.
So, with this change users should not notice any change when working with their old documents. Still you can encounter an issue, when copying layers from old files to new (and vice versa) - the colors of copied layers appear different in destination document. This can be easily fixed manually as described here.

Layers
Advanced Outline Layer
Advanced Outline Layer was completely rewritten and optimized in this version. Also, it is now capable to display two new types of tips - “Off-Peak Stop” and “Inner Rounded Stop”, that can be used to define outline start/end for dashes.
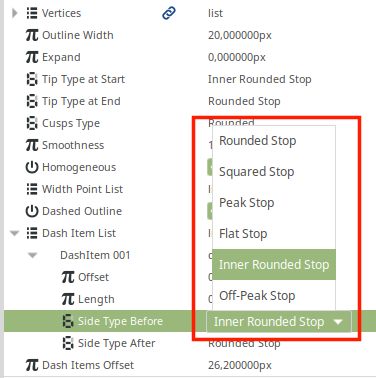
With this addition you can easily do effects like shown here (source file):
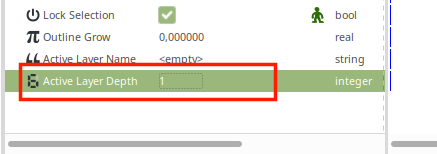
Switch Layer
Now it is possible to select visible layer by index in Switch Layer. This is done using a new parameter - “Active Layer Depth”. The parameter takes effect when “Active Layer name” parameter is empty.
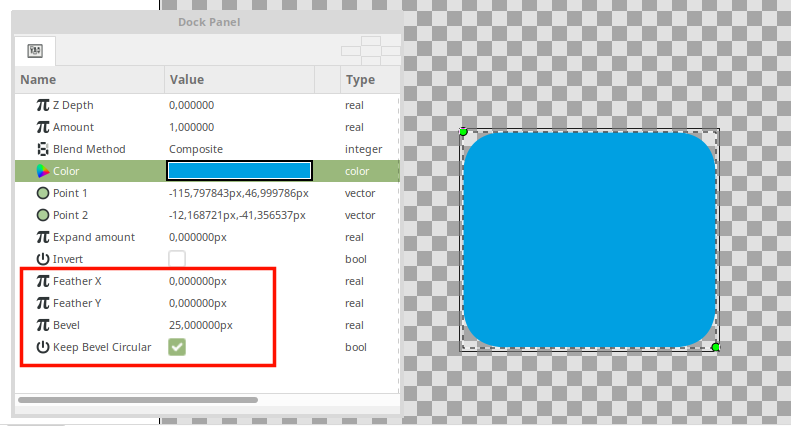
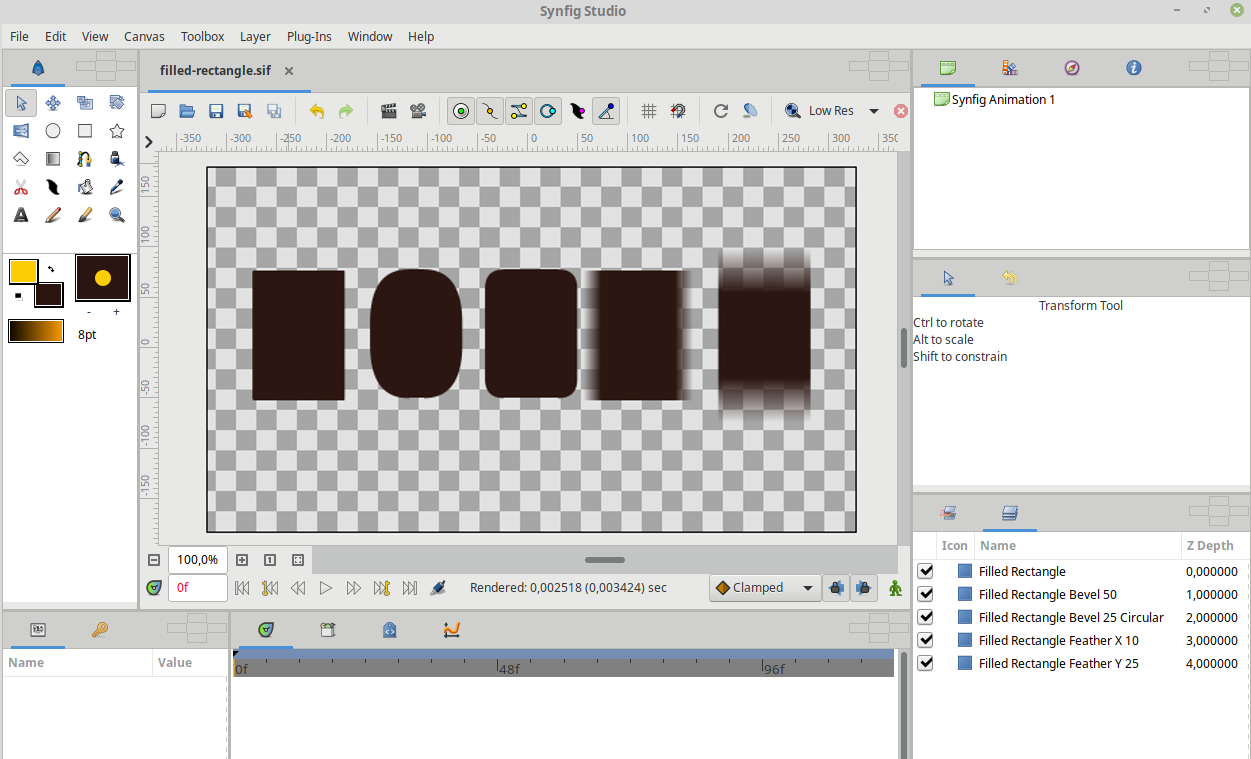
Rectangle Layer
Rectangle Layer now capable to have two types of rounded corners and horizontal/vertical feather. Users with a deep knowledge of Synfig know, that those features were available in Filled Rectangle Layer (not the same as Rectangle Layer), which was a part of Example layers. Now all those features are merged into standard Rectangle Layer, and the Filled Rectangle Layer is removed. See GitHub’s issue #745 for details.
Settings & Customization
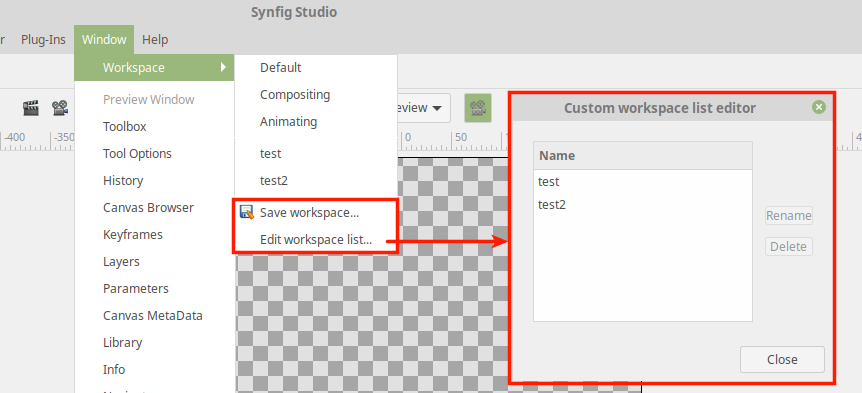
Saving workspace layouts
Now it is possible to save your workspace layout - just choose “Workspace” - “Save workspace” from menu. Also you can edit list of custom workspaces by calling “Workspace” - “Edit workspace list…”.
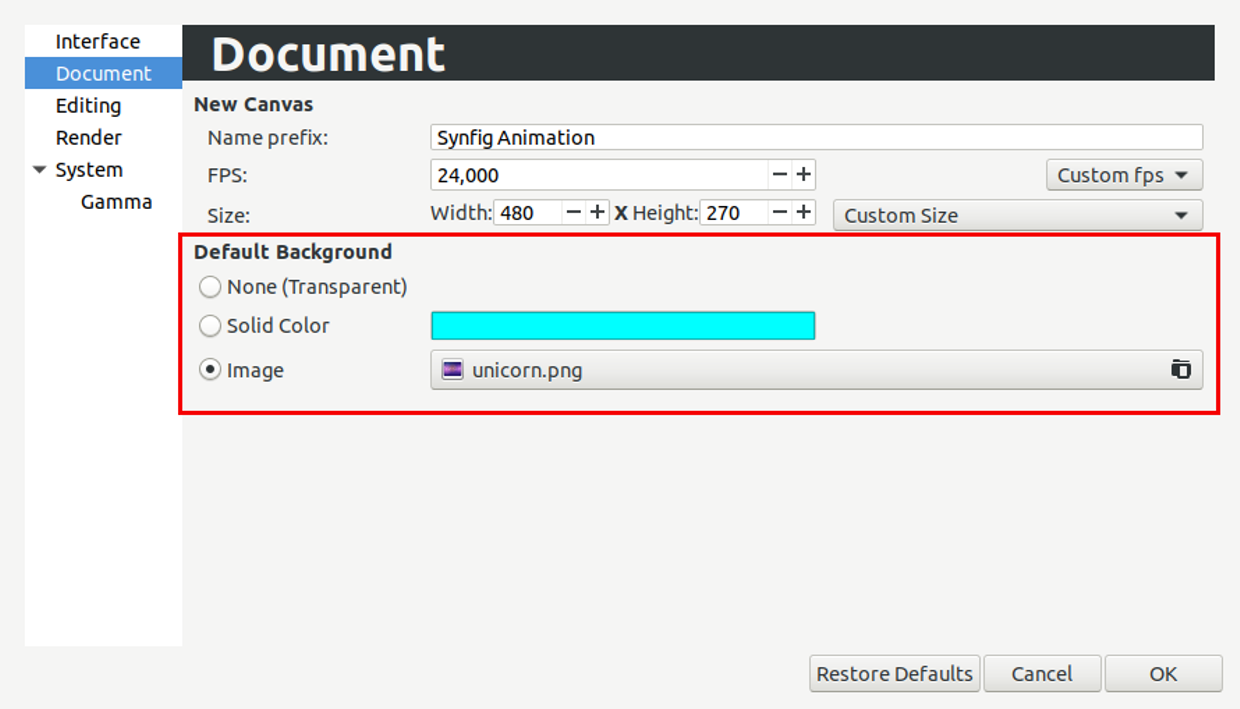
Default background for new files
Now it is possible to set default background for newly created documents (issue #636). The background can be a solid color or image. You can configure this via “Edit” -> “Preferences” -> “Document”.
Other notable improvements
Improved process of creating Splines and Polygons: now it is possible to finish shape creation with double-click or by hitting Enter. Also you can click first vertex of Spline to loop and finish shape creation.
Now it is possible to remove Layers by hitting Delete key.
Tab placement crosses now hidden by default and revealed only when user starts dragging some panel. See issue #238 for details.
Now it is possible to change animation length directly from workarea (see issue #684).
Double-clicking waypoint in Timetrack panel shows Waypoint Properties dialog.
Now it is possible to configure color of transparent areas in Preview Window (issue #636).
Workarea now has a widget to change length of timeline.
Brush Tool is now disabled by default. User can get it back by enabling “Experimental features” option in Preference.
Home/End keys now set time cursor to start/end of timeline.
Minor improvements
DashItem Offset and Length parameters of Advanced Outline now use consistent units when editing them (issue #1265).
Do not waste space for dropdowns in combo boxes (issue #650).
Show interpolation type directly in waypoint’s context menu (see details).
Disabled scientific notation when displaying numbers (issue #635).
When new Text Layer is created, its name is set the same as text content (issue #407).
Vertex handles now placed above tangent handles (issue #645).
Color dialog now opens with HSV tab active (issue #672).
Portable version of Synfig (zip) now writes settings to its own configuration directory (issue #716).
“Amount” parameter renamed to “Opacity”.
Playback is stopped when user clicks on timeline (issue #415).
Removed unused Change Preview Quality menu item.
Activate widget_filename right after user chooses file via button/file dialog (issue #1425).
Homogenous parameter of Advanced Outline is enabled and static by default.
Set Animation Speed parameter of Noise Distort Layer as static by default.
Bugfixes
Fixed issue when copying skeletons from one file to another. Previously this was resulting in corrupted file, but now it isn’t.
Fixed a very old and annoying issue with Ctrl+C/Ctrl+V shortcuts behavior, which was making impossible to use them for text entries in UI (layers were copy-pasted instead).
Fixed behavior “Local Time” parameter of Time Loop layer (issue #479).
Fixed issues opening and exporting of files with multibyte (i.e. Arabic) symbols in filename.
Fixed hang when opening a second .sif file from Explorer on Windows (issue #291).
Autosave now enabled by default (issue #657).
Removed “Cancelled by user” dialog that happens when the user tries to move an animated object (issue #693).
Fixed incorrect behavior of Draft rendering mode in some circumstances (issue 582).
Timebar is not hidden anymore for cases when scene is only 1 frame short.
Fixed issue with incorrect GUI font on some Windows systems (issue #667).
Fixed issues with incorrect window placement on Windows (issue #523).
Fixed issue which was preventing to change parameters at some circumstances (issues #659, #526, #520).
Fixed crash when exported value is set from parameters panel in animation mode (issue #588).
Fixed crash when user cancels parameter changing (issue #671).
Fixed wrong behavior of “Lock Ratio” button in Canvas properties and Rendering window (issue #771).
Fixed issues with Canvas not preserving Length and Resolution after exporting (issues #715 and #874).
Fixed issue with Linear interpolation for Integer parameters (issue #828).
Fixed bug with empty floating windows appearing after workspace switching (issue #1143).
Fixed crash when removing a Spline vertex using “Remove item (Smart)” (issue #1102).
Fixed popup menu disappearing right after button release for Widget Gradient/Spline (issue #1274).
Fixed crash when exporting with “pngspritesheet” target (issue #356).
Fixed crash when unexporting value node (issue #231).
Fixed renaming layer set affecting other names (issue #1146).