Snowflake with the Duplicate Layer
This tutorial explain a simple example of the use of the |Duplicate_Layer|, to create a snowflake.
First branch of the snowflake
The 1st part is very simple : We’ll create a single snowflake branch with the Spline Tool (or the Polygon Tool).
Select the Spline tool, and in the tools options, make sure that
only Create Region is checked. (If you use the Polygon tool,
check either Create Polygon Layer or Create Region, as you
wish).
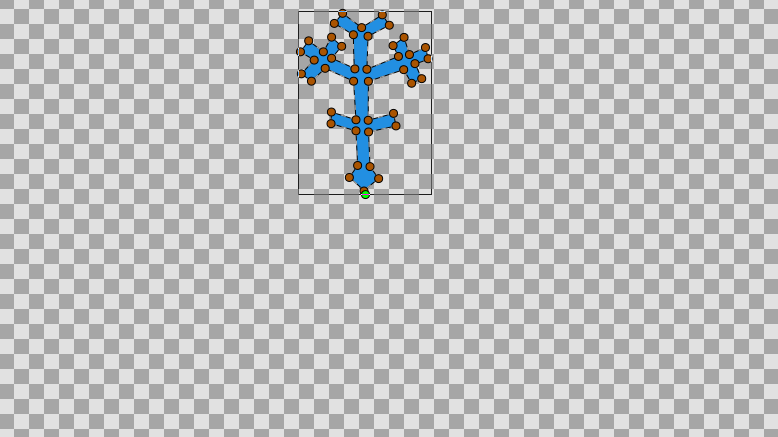
Draw the branch in the upper middle part of your image. Once it’s drawn,
select the newly created layer (I will refer to it as the “Branch
layer”) and make sure that the bottom of the branch is more or less at
the same place as the green dot showing the center of the image. You can
move your branch by selecting all the points Ctrl|A and using the
Transform Tool
Adding the Rotate and Duplicate Layers
To make a whole 6-branches snowflake, we need to make several copies of the branch, and rotate them.
First, we need a Rotate Layer. Right click on the
image and select |New Layer|Transform|Rotate. You should now have
a Rotate Layer on top of the Branch layer.
Then, we’ll use the Duplicate Layer. Right click on the image and select
|New Layer|Other|Duplicate.
So far, no change is visible on our image, it’s normal :).
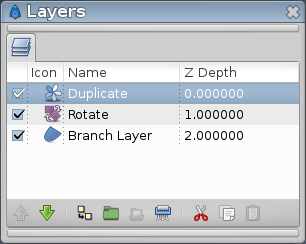
In the Layers Panel, make sure that the layers are in the following order : Duplicate on top, Rotate in the middle, and the “Branch” layer on the bottom.
Connecting everything together
Select the Duplicate layer and look at the Parameters Panel. There’s an Index value that is
automatically exported. Its name is Index 1. (It looks like
Index (Index 1) in the panel).
This value is made of 3 subparameters : From, To and Step.
Those parameters tells how many times an object is duplicated.
We need 6 branches so set the To parameter to 6 (keep From
and Step to 1).

Now move to the Library Panel, and select our
Index 1 value. (Unfold the ValueBase Node if necessary).
In order to have 6 rotated branches, we need to link the duplication and the rotation together.
Select the Rotate layer, and go back to the Parameters panel.
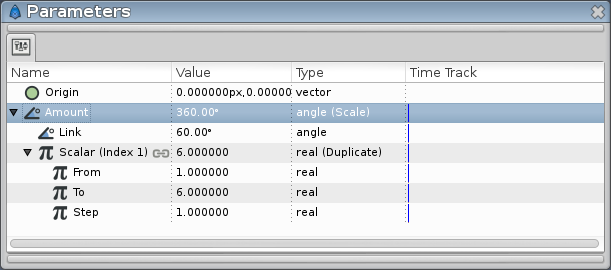
The Rotate layer has just 2 parameters: Origin and Amount. The
important one here is Amount, it tells the angle of the rotation.
Right click on Amount and select <Convert> → Scale.
Now Amount is made of 2 subparameters, Link (an angle) and
Scalar (a real), the whole rotation being equal to Link * Scalar.
Set the Link subparameter to 60 (that’s the angle between the
snowflake branches).
Right click on the Scalar parameter and select Connect. It will
connect the previously selected Index 1 value (in the Library panel)
to the Scalar parameter.
How it looks after the connection:
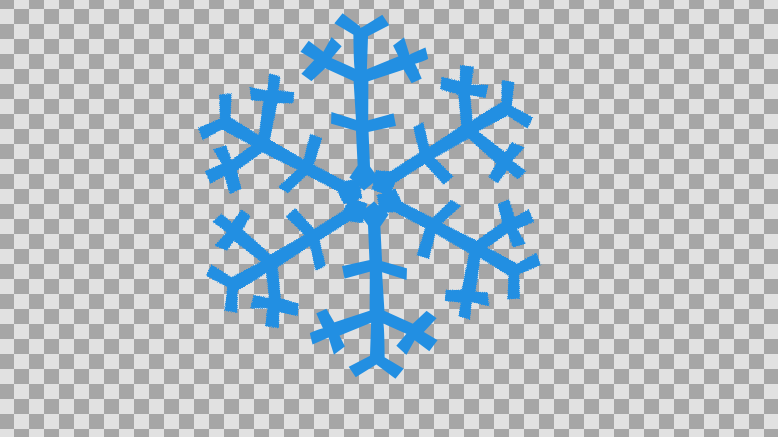
You should now have a complete snowflake, yay! (maybe you will need to adjust Rotate Layer’s Origin Parameter)
What happened?
We linked the “Scalar” value of the rotation to the duplicate layer:
Thanks to the Duplicate, the Scalar parameter was set to values between 1 and 6 (From and To), by steps of 1 - instead of being set to a single value.
So we had 5 rotations in addition to the original branche : One of 60° (Scalar * Link = 1 * 60°), another of 120° ( 2 * 60°), another of 180°, etc. And all of these rotations were displayed together.
You can think of the Duplicate Layer as something allowing you to have a list of values, that you can link to a (real) parameter in the same way you could link a single value to a parameter.